Update Security
Update Fail2ban
Go to the Fail2ban local configuration file:
sudo nano /etc/fail2ban/jail.local
Locate and add/update the following information to protect your new Apache, Wordpress and phpMyAdmin installations, plus two additional HTTP jails which are designed to try reduce DoS attacks from GET and POST calls:
#(...)

[apache-auth]
enabled  = true
port     = http,https

#(...)

[http-get-dos]
enabled = true
port = http,https
logpath  = /var/log/apache2/access.log
maxretry = 200
findtime = 10
bantime = 600

[http-post-dos]
enabled = true
port = http,https
logpath  = /var/log/apache2/access.log
maxRetry = 30
findtime = 10
bantime = 600

#(...)

[wordpress-auth]
enabled = true
port = http,https
logpath = /var/log/apache2/access.log

[phpmyadmin-auth]
enabled = true
port = http,https
logpath = /var/log/auth.log

#(...)
Then the relevant filters must be created
sudo nano /etc/fail2ban/filter.d/http-get-dos.local
[Definition]
failregex = <HOST>.*GET
ignoreregex =
sudo nano /etc/fail2ban/filter.d/http-post-dos.local
[Definition]
failregex = <HOST>.*POST
ignoreregex =
sudo nano /etc/fail2ban/filter.d/wordpress-auth.local
[Definition]
failregex = <HOST>.*POST.*(wp-login\.php|xmlrpc\.php).* 200
ignoreregex =
sudo nano /etc/fail2ban/filter.d/phpmyadmin-auth.local
[Definition]
failregex = .*phpMyAdmin.*user denied:.* <HOST>
ignoreregex =
Test the filter:
sudo fail2ban-regex /var/log/apache2/access.log /etc/fail2ban/filter.d/wordpress-auth.local
Once completed these changes, restart the service and check status:
sudo systemctl restart fail2ban
sudo systemctl status fail2ban
sudo fail2ban-client status
To check banned IPs and remove any IP address from the banned list:
sudo fail2ban-client status jailname
iptables -L -nv
sudo fail2ban-client set jailname unbanip ipaddress
Secure Admin Consoles
You will now add a second layer of password protection on the consoles of the Wordpress and phpMyAdmin packages installed in the previous chapters. This is done via Apache HTTP credentials, please select an username and have a strong password ready for entry when prompted:
sudo htpasswd -c /etc/apache2/.htpasswd yourHTTPusername
Now add the Basic Authentication requirements for both packages in the Apache configuration file:
sudo nano /etc/apache2/apache2.conf
Insert the following changes:
#(...)

<Directory /var/www/yourdomain>
        Options Indexes FollowSymLinks
        AllowOverride All
        Require all granted
</Directory>

#(...)

# Protect critical files with Basic Authentication
# this is a security configuration for phpMyAdmin on Apache
<Directory /usr/share/phpmyadmin>
  AuthType Basic
  AuthName "Private access"
  AuthUserFile /etc/apache2/.htpasswd
  Require user yourHTTPusername
</Directory>

# Protect critical files with Basic Authentication (.htpasswd)
# this is a security configuration for Wordpress on Apache
<Files ~ "wp-login\.php|xmlrpc\.php">
  AuthType Basic
  AuthName "Private access"
  AuthUserFile /etc/apache2/.htpasswd
  Require user yourHTTPusername
</Files>

#(...)
Now restart the Apache web service:
sudo systemctl restart apache2
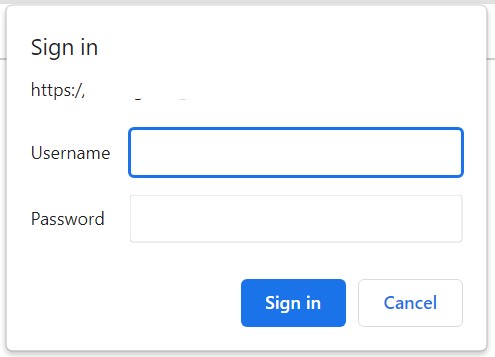
and from now on, every time you navigate to either Wordpress admin area or to your phpMyAdmin console, you will be prompted for an additional set of credentials before even landing on the login page:
Additional homework
Wordpress links like wp-admin & wp-login are not only ugly to type, but they are also a very popular target of malicious intentions.
idea: obscure these links via HTTP rewrite clauses.
Nested folders like yourdomain/wp-content/uploads are exposed!
idea: forbid access with the no indexing clause in Apache, however that may result in other problems?